Some time ago, I came across the site Knock-Off Wood (now Ana-White.com). If you haven't visited Ana's site yet, you really should. I have a stack of plans printed out and ready to build. In fact, just today I got the wood I need for my next project...a gift for my sister-in-law Lesa.
The toddler bed for Scarlett was my first big project, and I was so proud of myself for building it. Here is a link to the plans I used. I modified plans for the farmhouse bed canopy (also found on Ana's site) to fit the toddler size bed - the posts are 2x2 turning posts from Lowe's. I also made some fixed siderails that can be taken off later. It was surprisingly easy to build...the hardest part was getting the canopy just right.

A few of shots with Scarlett and Savannah just so you can get an idea of the size.


Scarlett is still sleeping in her crib (which is pushed to the side for the photo shoot), because she hasn't shown any signs of trying to climb out of it yet. As soon as she does, we'll switch to the toddler bed.


I made the nightstand from these plans. It reminds me of an old wooden ladder, and it's the perfect size for a toddler nightstand.

I found this nightlight/lamp at Land of Nod. It looks like an old vintage lantern, but it uses a 15 watt bulb and has a two-way switch. It's perfect for a night light on the lower setting, and the higher setting is perfect for reading bedtime stories.

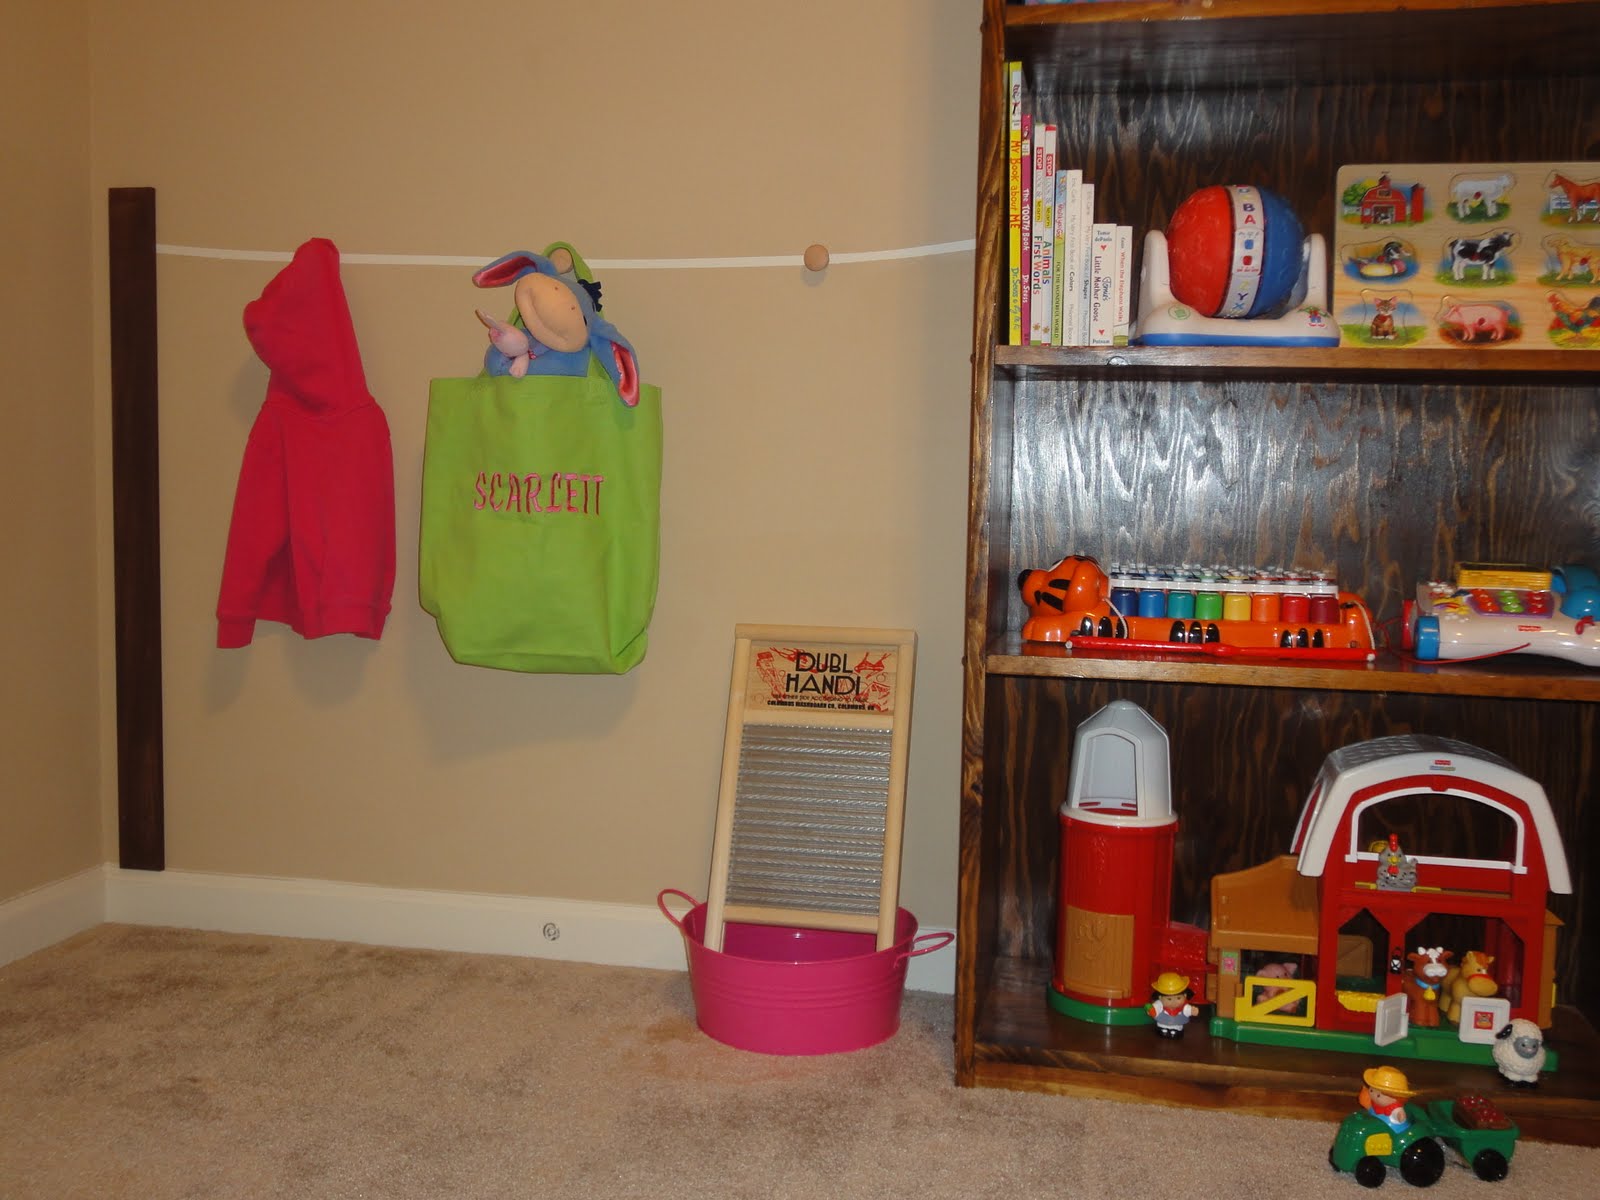
Between the closet and the bookcase, I made a littel pretend clothesline for hanging coats. The "post" is a thin piece of craft wood from Lowe's that I stained and nailed to the wall. I made the "line" with white paint. The "clothespins" are just plain wood cabinet pulls from Lowe's...I drilled sheetrock wall anchors into the wall and then screwed the pulls in using anchor bolts.


I found a real scrub-board at Ace Hardware, and the little washtub came from Target.
These cute little fabric birds are roosting above the closet doors. This is why I was so long posting about the room...it took me forever to sew and stuff all these little birds. I grabbed a couple of limbs from Mom's backyard, hot-glued the birds to the branches, and hung the whole thing from the ceiling with thread....I should have used fishing line so it wouldn't be visible, but I didn't have any on hand and I was ready to get it done.


The pattern for the birds can be found here at Spool.
Changing table and Savannah's old mini rocking chair.

On the ceiling above the bed are lots of glow-in-the-dark stars. You may have to click to enlarge the second photo to see them in the dark...they show up much better in person than on camera.


I love that Scarlett can lie in bed and look at the stars before she falls asleep.
I was tempted to go all-out with theme...old fashioned toys, ragdolls, etc. But I know it won't be long until Scarlett has her own opinions about her room decor, so I kept it simple. So, that's it...Scarlett's room revealed. What do you guys think?
12 comments:
What a nice little girls room. I am so impressed that I called and told Faye to go to your blog and look at Scarlett's pretty room. We love you!!
awesome!! :)
Christy, that bed is crazy cute!
Thanks, guys...and thank you, Ana! I couldn't have done it without you :)
wow, you did such a great job. What type of adhesive did you use for the stars?
I attached the stars with Locktite adhesive found in the glue section at Lowe's. I hope I never have to take them down - they are up there for good!
Christy
Go to QVC.com, and to David Venable's recipes, and look at the very last one on the list, which is Healthy Turkey Taco Dip. It sounds like something that your family would really like. It is a layered dip.
I'm a new builder myself and just adore your version of this bed, I want to build a twin sized for my 3yr old.... I was wondering how the 2x2's are holding up? I feel like 4x4's might be too big for a twin size but worry if a 2x2 would be enough. Thanks for any opinion!
The 2x2 posts held up just fine. She's graduated to a twin size bed now.
sorry to bother you again but I really want to make this for my daughter, for the canopy... did you build that separately and attach it some how (how??) or is it part of the actual legs/frame (and then how did you make it look like the canopy comes out of that horizontal top section, cut and piece around the 2x2?) Thank you again!
The canopy is separate from the bed. I drilled a hole into the bottom of each post and where it would sit on the head/footboard, inserted a wooden peg, and attached it that way...so it just sits in place. The top was really just rigged the best way I could with metal brackets on the top. It would be easier to do with a kreg jig (which I didn't have at the time). This link is for a canopy and is much better than the way I made mine.
http://ana-white.com/2011/01/lydia-toddler-bed
Thank you very much! I have a kreg so I should be good to go! I appreciate your assistance :)
Post a Comment